How to Replace MacBook Air Keyboard: The I (signifying Irony of Life :P) key on my mid-2012 MacBook Air-popped out the other day, I just pushed it back in place and continued working. A few days later it popped out again, so I made an appointment with the Genius Bar. I arrived hoping they would just have to pop in a new key, but nada. They said the metal hooks which hold the key are bent, and they will have to change the top case. By top case, they meant the metal shell along with the keyboard.
They would have to remove the battery, speakers, solid-state drive, main logic board, fan, etc, and replace the top case. The cost of repair quoted by Apple is around $280. My brain told me, “walkabout bro, it’s time for a DIY” and I obliged. And guess what, I did it. The total cost of repair – $30 and three hours, I already had the screwdrivers needed and just had to order the keyboard with backlight. Let’s jump into how to replace the MacBook Air keyboard replacement cost is less than $30.
How to Show Battery Percentage on macOS Monterey
How to Replace MacBook Air Keyboard For Less Than $30
Warning
We are not responsible if your MacBook Air doesn’t boot after this process. You are doing this at your own risk.
What models does this apply to
This process applies to all MacBook Air models (2011 – 2015) and sizes (11 inches & 13 inches). We did this on our 11 inches mid-2012 MacBook Air model A1465, but it will work on A1466, A1369, and A1370 as well.
Pre-Requisites
1. Patience – This process will take around 3-4 hours so you need to have some patience. The most time-consuming part is removing and putting in the new keyboard. Apple decided to stick in around 40 small screws.
2. Replacement MacBook Air Keyboard with Backlight and Screws. Hit the links below for your respective screen size. We will not be going through the effort of trying to separate the led light from the keyboard without breaking it. This is because the price difference of buying the keyboard without the backlight is not worth the time and effort.
11 inch MacBook Air (2011-2015)
13 inch MacBook Air (2011-2015)
3. A spudger, Pentalobe screwdriver, T5, T8 screwdriver, and a PH00 screwdriver. You can find all these tools in the links below, choose whichever is cheaper at the time.
15 Piece Precision Set for Macbook Air – Fixinus, Spudger Tool
4. Packaging Tape – pretty sure you have it at home or just hit the link below.
Scotch Packaging Tape – Add on Item
5. Two or three blank pieces of paper and a pen.
The screws on the MacBook Air are of different sizes for some parts. We use a piece of paper and pen to make sure we have the right screws for the right spot. Check out the pictures below for a visual look.
8 Tips You Must Know Before Using iPhone for the First Time
Step 1 – No DIY is complete without ifixit
Head over to iFixit and choose your MacBook Air screen size and year. On the replacement guides page choose Upper Case. Follow the guide till the point where it asks you to remove the trackpad screws. We do not need to take out the trackpad for our keyboard replacement. In our case, we followed this guide until step 40. If you can’t find a guide for your model leave a comment below and we will help you find it.
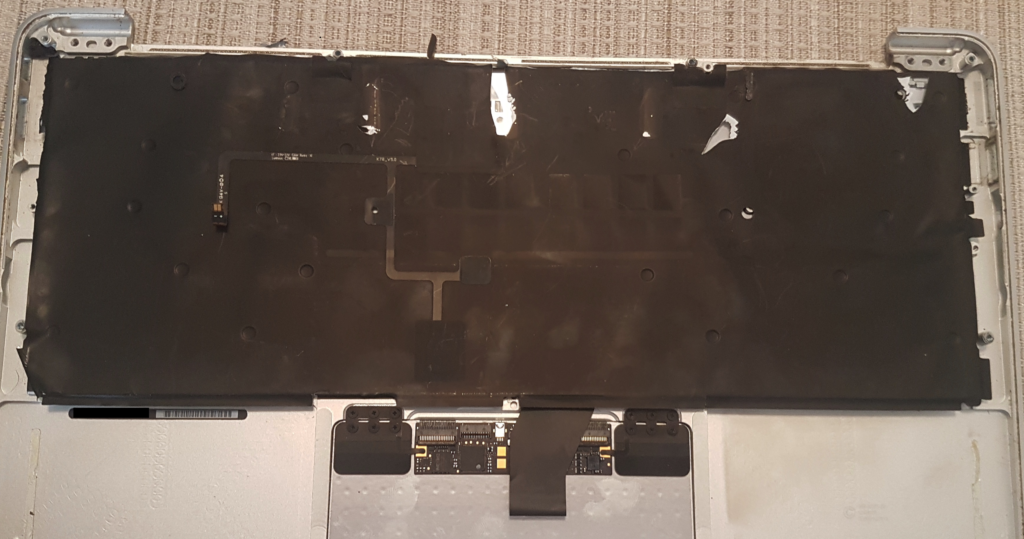
If you followed iFixit’s guide to the tee, this is what your MacBook Air should look like.
Step 2 – Remove the Black Film with LED
The black film you see contains the led lights to ensure your MacBook Air has a backlit keyboard. This film is stuck to the keyboard using adhesive, you can try to remove it by using a hairdryer but we decided to replace it with the backlight we got with the keyboard. Just cut the parts of the black film sticking to the MacBook Air body on either side and pull it off.

Step 3 – Remove the black screws holding the keyboard to the frame
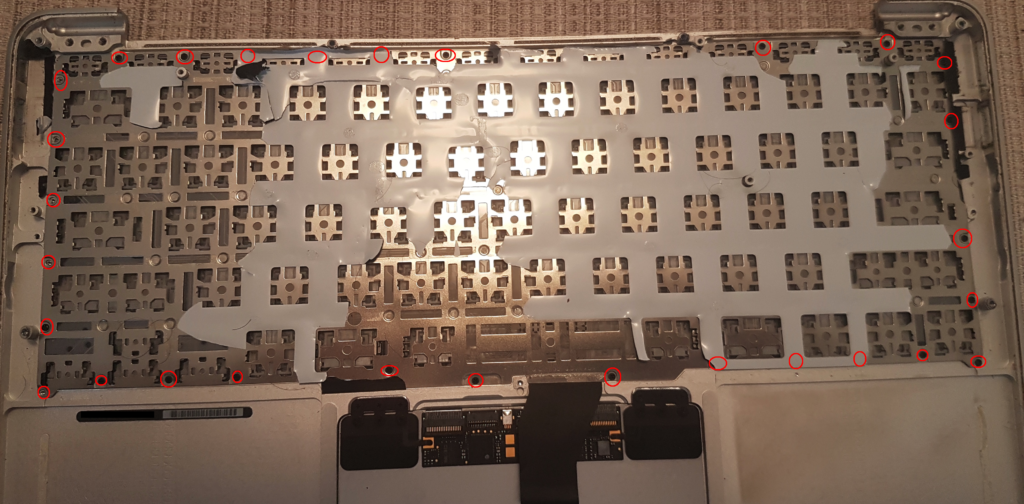
This is the second most frustrating part of this DIY. Remove all the small black screws on the outer edge of the metal frame using the PH00 screwdriver. Once that is done, tape up the back of the keyboard. This will ensure that rivets don’t scatter all over your room. Once you have applied the tape, pull the keyboard off. This will require some force. Not all rivets will pop up, don’t bother removing the rivets which are stuck in. Take this opportunity to clean the frame if you want.
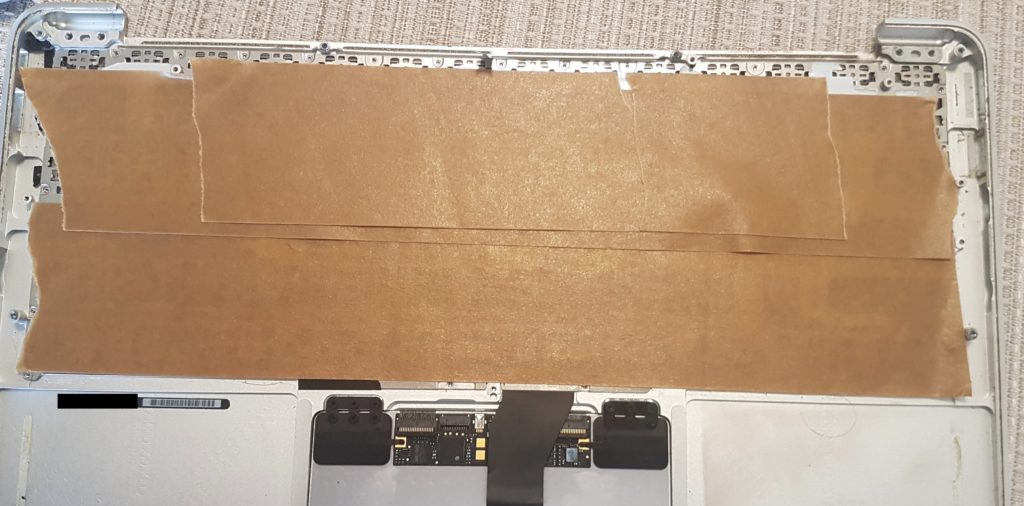
Step 4 – Put in the new Keyboard
This is the most frustrating part of this DIY. Attach the keyboard ribbon cable to the slot, but the lockdown, and then put in the new keyboard and screw down the small black screws on the edge. For the rivets which popped out, put in the screws which came with the new keyboard using the PH00 screwdriver. Doesn’t matter if the screws are not flush with the body.
Step 5 – Put in the new Backlight
Align the new backlight with the holes, once aligned remove plastic from the adhesive, and press firmly along the edge. This will ensure the new backlight sticks properly.
Step 6 – Reassemble
Reassemble the MacBook Air by following the steps in Step 1 in reverse order.

That’s it, folks. Let us know your comments on how to replace MacBook Air Keyboard for less than $30 via the comments below.
